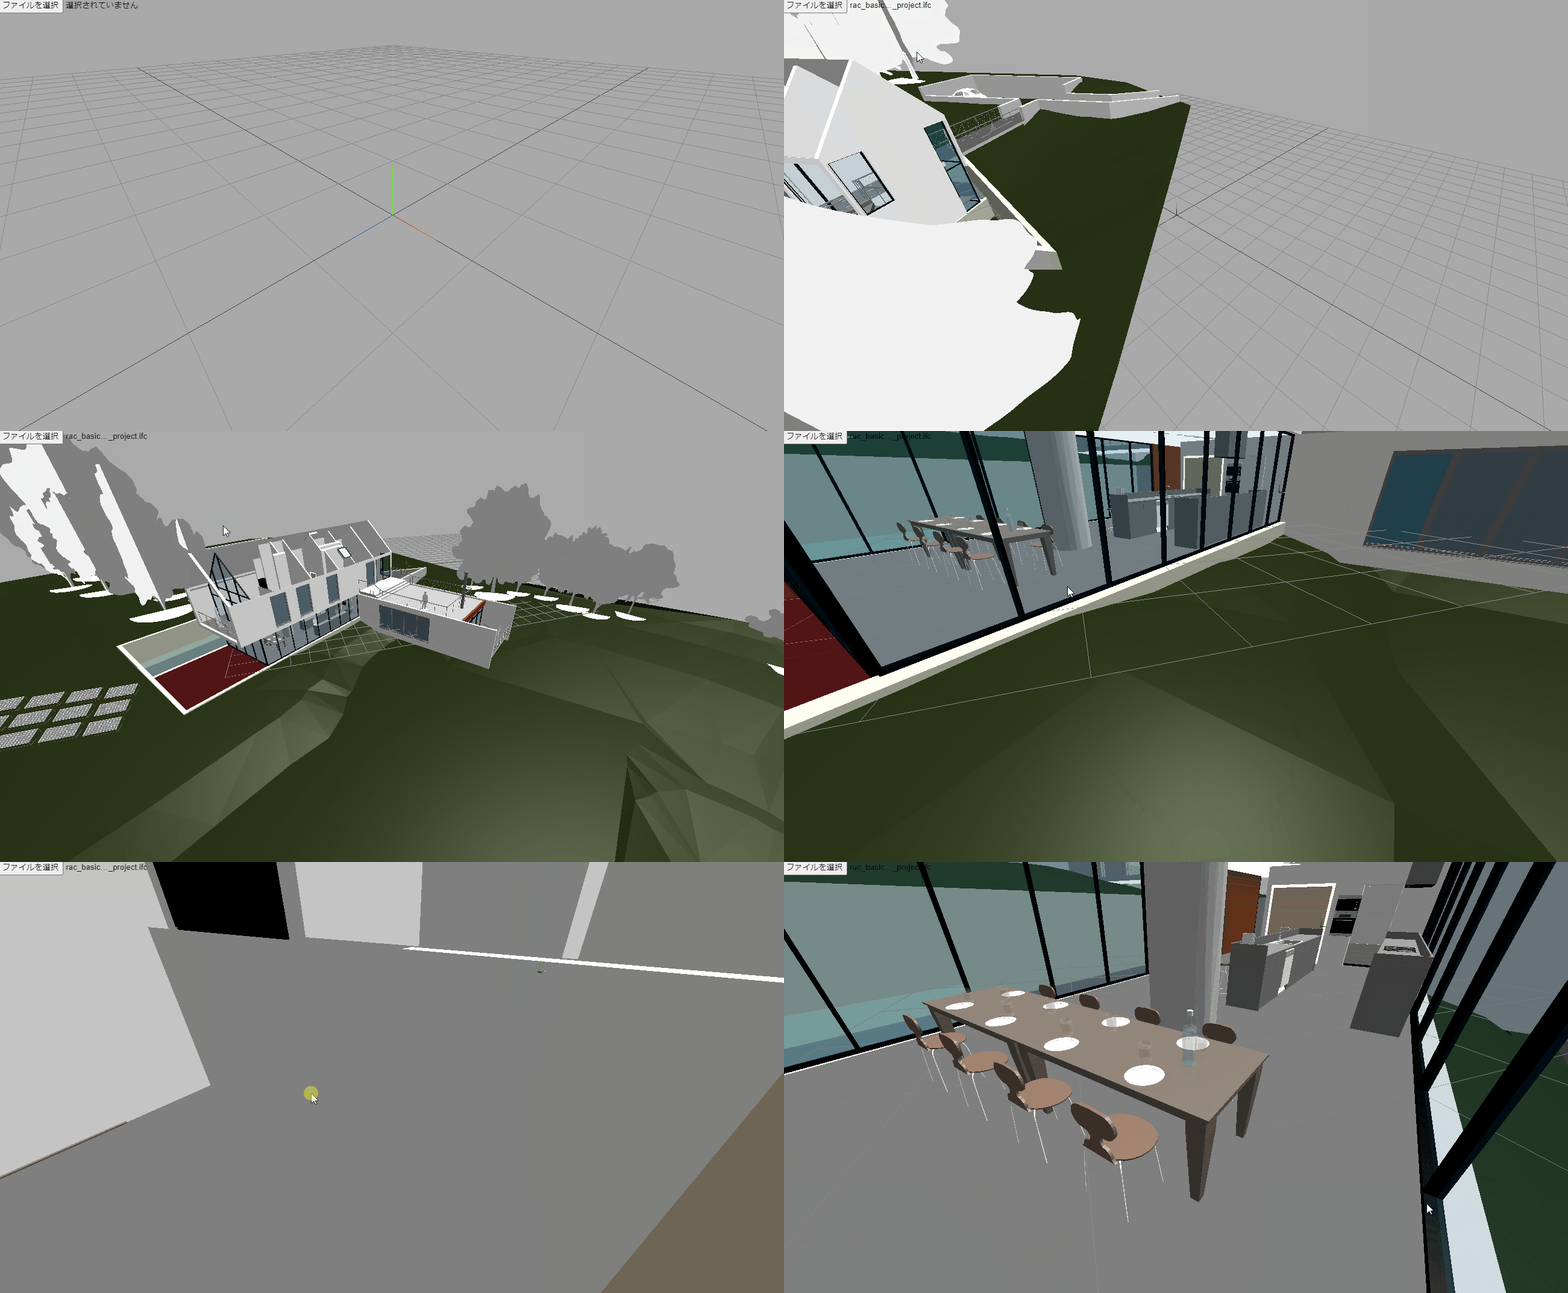
Hello IFC.js
03 May, 2021 - 4 min read - Tags: JavaScript
はじめに
IFC.js が面白そうなので始め方を紹介します。
JavaScript で IFC を扱えるようにすることを目標にして開発されているものです。 単純にすべてを JaveScript を使って書いてしまうと動作が重くなってしまうため、速度が求められている部分は C++で書かれた WASM を使っています。
以下の公式のサンプルリポジトリをもとに進めます。ファルダ構成などは以下に準拠しています。
IFC.js の公式ドキュメントは以下です。
まずは完成品の動作を確認したい場合は以下です。
環境構築
開発は VSCode の使用を想定します。Extension の LiveServer を使うと確認が楽です。
パッケージ管理は npm を使うので、Node.js をインストールしてください。
インストールできたら対象のディレクトリで npm を init します。
npm init -yモジュールバンドラーには rollup.js を使用するので以下でインストールしてください。グローバルでインストールする場合は以下です。
npm install --global rollupIFC.js は Babylon.js や Three.js を使うことで簡単にモデル可視化できます。
ここでは Three.js を入れて使います。
npm install -s threerollup.js はそのままでは npm でいれたものを扱うことができないので以下もいれます。
npm install -s rollup-plugin-node-resolveIFC.js は web-ifc.wasm が必要なので以下からダウンロードして wasm フォルダに入れてください。
コード作成
バンドル用のコンフィグファイル作成
rollup.config.js という名前で以下を作成します。 rollup を使って app.js から bundle.js を作成するという中身になっています。
import nodeResolve from "rollup-plugin-node-resolve"

export default {
  input: "app.js",
  output: {
    file: "bundle.js",
    format: "cjs",
  },
  plugins: [nodeResolve()],
}
html ファイルの作成
index.html を以下の内容で作成します。
<!DOCTYPE html>
<html lang="ja">
  <head>
    <meta charset="UTF-8" />
    <meta name="viewport" content="width=device-width, initial-scale=1.0" />
    <title>My first ifc.js</title>
  </head>
  <body>
    <!-- ファイル読み込み部の作成 -->
    <input type="file" name="load" id="file-input" accept=".ifc" />
    <!-- threejsのcanvas作成 -->
    <canvas id="three-canvas"></canvas>
    <!-- bundle.js の読み込み -->
    <script src="bundle.js"></script>
  </body>
</html>
js ファイルの作成
app.js を以下の内容で作成します。
まず Three.js で必要なものを import する。
import {
  AmbientLight,
  AxesHelper,
  Color,
  DirectionalLight,
  GridHelper,
  PerspectiveCamera,
  Scene,
  WebGLRenderer,
} from "three"
import { OrbitControls } from "three/examples/jsm/controls/OrbitControls"
import { IFCLoader } from "three/examples/jsm/loaders/IFCLoader"
シーン、カメラ、ライトを作成。
const scene = new Scene()
scene.background = new Color(0xaaaaaa)

const size = {
  width: window.innerWidth,
  height: window.innerHeight,
}

const camera = new PerspectiveCamera(75, size.width / size.height)
camera.position.z = 3
camera.position.y = 3
camera.position.x = 3

const lightColor = 0xffffff

const ambientLight = new AmbientLight(lightColor, 0.5)
scene.add(ambientLight)

const directionalLight = new DirectionalLight(lightColor, 1)
directionalLight.position.set(0, 10, 0)
directionalLight.target.position.set(-5, 0, 0)
scene.add(directionalLight)
scene.add(directionalLight.target)

const threeCanvas = document.getElementById("three-canvas")
const renderer = new WebGLRenderer({ canvas: threeCanvas })
renderer.setSize(size.width, size.height)
renderer.setPixelRatio(Math.min(window.devicePixelRatio, 2))
グリッドと座標軸を作成。
const grid = new GridHelper(50, 30)
scene.add(grid)

const axes = new AxesHelper()
axes.material.depthTest = false
axes.renderOrder = 1
scene.add(axes)
マウスから画面をコントロールできるように OrbitControls を設定。
const controls = new OrbitControls(camera, threeCanvas)
controls.enableDamping = true
毎フレームの描画処理を設定。
const animate = () => {
  controls.update()
  renderer.render(scene, camera)
  requestAnimationFrame(animate)
}

animate()
ウィンドウサイズの変更に追従するように設定。
window.addEventListener("resize", () => {
  ;(size.width = window.innerWidth), (size.height = window.innerHeight)
  camera.aspect = size.width / size.height
  camera.updateProjectionMatrix()
  renderer.setSize(size.width, size.height)
})
IFC の読み込み部分の作成。
const ifcLoader = new IFCLoader()
// web-ifc.wasm のあるファルダを指定する。
ifcLoader.setWasmPath("wasm/")

const input = document.getElementById("file-input")
input.addEventListener(
  "change",
  (changed) => {
    var ifcURL = URL.createObjectURL(changed.target.files[0])
    console.log(ifcURL)
    ifcLoader.load(ifcURL, (geometry) => scene.add(geometry))
  },
  false
)
これで完成。
コード全体は以下。
import {
  AmbientLight,
  AxesHelper,
  Color,
  DirectionalLight,
  GridHelper,
  PerspectiveCamera,
  Scene,
  WebGLRenderer,
} from "three"
import { OrbitControls } from "three/examples/jsm/controls/OrbitControls"
import { IFCLoader } from "three/examples/jsm/loaders/IFCLoader"

const scene = new Scene()
scene.background = new Color(0xaaaaaa)

const size = {
  width: window.innerWidth,
  height: window.innerHeight,
}

const camera = new PerspectiveCamera(75, size.width / size.height)
camera.position.z = 3
camera.position.y = 3
camera.position.x = 3

const lightColor = 0xffffff

const ambientLight = new AmbientLight(lightColor, 0.5)
scene.add(ambientLight)

const directionalLight = new DirectionalLight(lightColor, 1)
directionalLight.position.set(0, 10, 0)
directionalLight.target.position.set(-5, 0, 0)
scene.add(directionalLight)
scene.add(directionalLight.target)

const threeCanvas = document.getElementById("three-canvas")
const renderer = new WebGLRenderer({ canvas: threeCanvas })
renderer.setSize(size.width, size.height)
renderer.setPixelRatio(Math.min(window.devicePixelRatio, 2))

const grid = new GridHelper(50, 30)
scene.add(grid)

const axes = new AxesHelper()
axes.material.depthTest = false
axes.renderOrder = 1
scene.add(axes)

const controls = new OrbitControls(camera, threeCanvas)
controls.enableDamping = true

const animate = () => {
  controls.update()
  renderer.render(scene, camera)
  requestAnimationFrame(animate)
}

animate()

window.addEventListener("resize", () => {
  ;(size.width = window.innerWidth), (size.height = window.innerHeight)
  camera.aspect = size.width / size.height
  camera.updateProjectionMatrix()
  renderer.setSize(size.width, size.height)
})

const ifcLoader = new IFCLoader()
ifcLoader.setWasmPath("wasm/")

const input = document.getElementById("file-input")
input.addEventListener(
  "change",
  (changed) => {
    var ifcURL = URL.createObjectURL(changed.target.files[0])
    console.log(ifcURL)
    ifcLoader.load(ifcURL, (geometry) => scene.add(geometry))
  },
  false
)
バンドルする
app.js が作成できたので、rollup を使ってバンドルします。 rollup.config.js があるディレクトリで以下のコマンドを実行します。
rollup -c完成
問題なく bundle.js が作成できたら、VSCode の LiveServer を使用して作成した index.html を開き動作しているか確認しましょう。
LiveServer は VSCode の右下に Go Live というボタンがあるのでそれを押すことで起動します。

左上から IFC ファイルを読み込めばモデルが表示されます。
